This little kitchen is an absolute ripper! Fits in the back of most vehicles
Dimensions:
Height: 290mm
Length: 900 mm
Width: 480 mm
Weight: 24 kgs
The DCB can hold a single burner stove, billies, plates cups etc for two to four people. It comes with a plastic wash tub. It’s very light, and easy to set up. it can be accessed while still in the vehicle, or lifted out and set up anywhere as a camping kitchen, using the unique Drifta designed folding bench and leg system. It is lined with ‘bootliner’ carpet, to match in with existing draw systems. If you’re going away for the day, the night, or the weekend, just chuck in the DCB. Once you’ve used it, you won’t leave home without it again.
Your DCB comes with :
Freestanding legs
3 x drawers
Plasic wash tub
fold over bench space
Hand water pump and 1 m hose
Extras you may like : Rear light stand for DCB. $55.
This is our Drifta Rear light Stand for the car back kitchen. It is a great addition to this kitchen, giving you a perfect place to add a Drifta light pole or Snowpeak lamp.
These lighting options directly over your Drifta kitchen will make night cooking a breeze!
Add one of these in the comments section of the enquiry form or email [email protected] to get your hands on one.
The LED power poles
or Hozuki light will work very good with this light stand upgrade
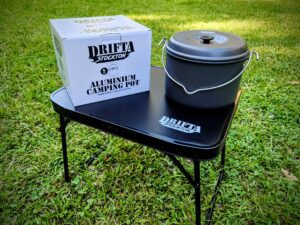
Creeky's Kitchen Picks
Here are Creeky’s top picks of products that he recommends to use with our Drifta Camping Kitchens. Save 10% off the RRP!
Here we are camping in Oregan. We had the best camping setup in the whole of the states… an oztent, oztent chairs, a D2DWT (drifta two drawer with table) in the back of the truck, and a SD DCB. can’t get better than that! we had just been to a camping show in a place called Ellensburg, in Washington state, north west area, selling our drifta’s… some of the americans complained that the DCB was too heavy to lift in the truck.. I’ve never had this problem in Australia, so I took this photo to show them, that if they can’t lift it themselves, they can get their missus to do it for them! :) this is a fully loaded DCB. anyway, there is always two of you, so it’s not a big deal. only two problems camping in NW USA, bears, and bloody yobbos… everywhere.. fairdinkum, no wonder they all camp in motor homes..
the drifta car back being used in germany. We’re now sending these kitchens all over the world.
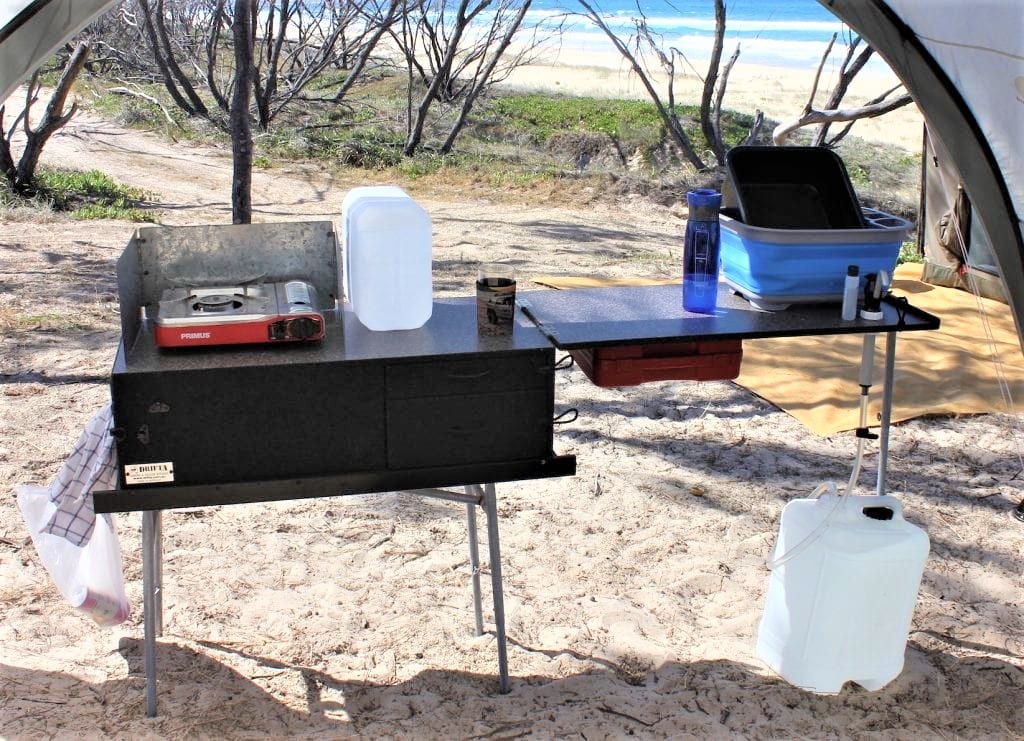
The DCB on the Murry River in SA. See how good the adjustable legs are, keeping it up off the ground, nice and level, and at a good height.
The DCB sits in the back of your vehicle, on top of existing drawers, or as one. The front draw compartment can be accessed while its still in the back. If you have other gear inside, you wont be able to access the two front drawers, as they pull out from the side. Although, the DCB can be incorporated onto a draw slide, much like a fridge slide, so it can be pulled right out, and you can access the front drawers also.
Shown here, the front draw, which is designed to hold up to two single burner stoves. We have stayed away from fitting 2 and 3 burner standard stoves, as then you need a gas bottle, which a lot of people dont want to carry. So you can store 2 x single burner butane stoves(similar then to a two burner stove ). These are stored in the back of the front draw. For a quick stop, these can be lifted out to be used.
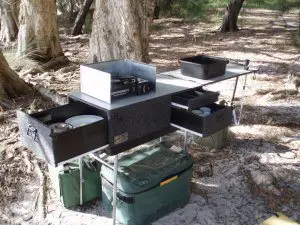
The DCB can then be lifted out and set up anywhere on its freestanding leg system, the same as I have on my trailer kitchens. They fold down from underneath, are fully adjustable and very sturdy. Then the lid swings over and forms the extra benchspace, and is again supported by a leg, which is attached to the LHS when folded up ( you can just make this out is the top right photo )
It then gives you 1600 mm of laminated , nice and high bench space. You can see the two smaller drawers , the top one is a cutlery draw, and underneath is a draw which holds a plastic wash up tub, that can be lifted out. We can incorporate a hand pump on the fold out section, but many 4WDs have a water tank or similar, so this may not be necessary for everyone.
The DCB is very easy to carry by one or two people.
Once the legs are set down, and locked into place, they can be adjusted to suit the ground, and your desired cooking height.
The lid flips over, and is supported with the leg, which fits onto some clips on the back of the kitchen.
Then you can get out the pump and sink, and hook it up to a jerry can, for your water supply. It’s very handy being able to easily pump the water, rather than try to tip it out of a jerry can from the ground.
The single burner stove can be lifted out and set up. then you have a very functional kitchen ready to use.
The plastic sink can sit on the edge of the lid, so you have one hand to hold it , and the other to pump the water.
There are three drawers, all on rollers. Drawers are such a luxury when camping
This is the large draw on the end. Here I have my single burner stove, spare gas can, 2 x billies (one inside), frying pan, 6 plates, 6 bowls, toaster, tea, coffee, wind shield, and washing detergent.
The top draw from the side, is like a cutlery draw. I have all my cutlery, tongs, egg flip etc, bottle opener, black tape, pocket knife, lighter etc.
The lower side draw has the wash up tub. It is lifted out and then cups etc put back in the draw. Here I have the tub, pump, hose, 6 x cups, paper towel, dish cloth. Everything you need for a day trip to a weekend away.
SOME PHOTOS OF THE DRIFTA CAR BACK IN USE.
These few weekends we were camping at Myall Lakes, near Forster NSW. It’s a beautiful camping spot, but only accessible by boat, so here we slept in the boat and set up our camp on the shore. The DCB was perfect. It is just so good to use. Except the wind blew up that night, making it a rough night on the boat.
It was a bit calmer this night. Before I left, I dragged the DCB out of the shed, chucked it in the truck. I never have to even open it up, cause I know everything I need is in there. It is such a great little kitchen.
Here’s a few photos of the DCB being used. i took the boys on a trip to the Birdsville races. the DCB was bloody great. it was sitting on the back of the courier, we could lift it off and have a cuppa/sandwich ready in a few minutes, and also had plenty of bench space etc to organise cooking meals for everyone at breaky and dinner.
We travelled out thru camerons cnr, and up thru walkers crossing to birdsville. it was the boys first desert trip, we had a mad time driving , and Birdsville was awsome, even though there were no races. Luke
A FEW PHOTOS OF THE DRIFTA CAR BACK BEING BUILT (2007)
Andrew my 3rd year apprentice building the carcus of the car backs. Everything is pinned and glued together, then pre drill screwed.
Then all the edges are belt sanded smooth, and the edges routered if needed.
Andrew trimming the edge on a sheet of ply, before cutting the lids for the car backs.
Corbin, our 1st year apprentice, is laminating the lids.
Corbin fitting the bootliner onto the carcus. Then it has to be trimmed up, ready for the skids to be fitted.
Here Andrew has finished the carcus, and is finishing off all the fittings. It’s very fiddly building these, as are most of the kitchens. You have to be well organised to make them the quality they are , but quick enough to stay in business. Andrew does a beautiful job on these car backs. There is nothing like it in the world, the Drifta Car Back, handcrafted by young aussies. And so practical to use. How good is that. You will be proud to own one.
Got a question? Check out our FAQ PAGE for more info.
INSTRUCTIONS FOR DRIFTA CAR BACK – DCB
Hi, thanks for your purchase of our Drifta Car Back kitchen. The unit is very easy to set up, but please take note of the following instructions, it will help you to better understand how to best use your DCB.
STEP 1 The unit can be used while in the vehicle for quick stops. The setup of the DCB be done fairly easily on your own, but if someone else is around, you can get them to help.
STEP 2 To remove the DCB from the vehicle, pull it out about 2/3 of the way, and pull down the front legs from underneath, until they “click” lock in place.
STEP 3 using the rear handle, and the front rope handle (the front black chest handle is only for opening the draw, not for lifting the kitchen, you must use the rope handle for this. ) lift the DCB onto the ground, while still holding up the end like shown.
STEP 4 now swing down the other legs, until they lock in place.
STEP 5 now you can adjust the leg length, or adjust it for uneven ground. Be sure to nip up the “T-nuts” fairly tight when adjusting the legs. You will normally need to make the legs a bit longer, to get a comfortable working height. (the front legs can now be left long, but the rear legs will have to be dropped back down to pack up, see fold up instructions. )
STEP 6 grab the leg from the back, and clip it onto the end of the lid. This can then be adjusted to make it level with the rest of the kitchen.
STEP 7 get the pump out of the draw, undo the plastic nut, fit the pump in the hole, and then do up the nut again underneath. Just finger tight is ok. Push the hose on the bottom of the pump, and drop the other end into a jerry can.
STEP 8 the black tub can lift out. (you have to pull the draw right out to get the tub out) you can sit the lip of the tub against the bench , so you have a free hand to pump the water…
There you go, all finished. The front draw is designed to hold a single burner stoves, then also you could put in some billies, frying pan etc. The rear top draw would be cutlery etc, under that is the draw which holds the plastic tub. Stuff can be stored in the tub, things like tea towel, dishcloth/detergent, or plates/cups, but again whatever you want really. The plastic tub can be taken out, but to do this, you need to pull the draw right out, and drop it down slightly, which will let you remove it easily. That’s about it I think. Now you’ll have a neat, compact storage unit that folds out into a handy little kitchen. Hope you can get some good use out of it. Thanks again for your purchase, if there’s anything you’re not sure of, or you have any problems, please give me a call anytime. Rgds Luke
HERE’S THE FOLD UP INSTRUCTIONS.
STEP 1 Fold the lid over, remove the leg and put it back where it was. Now here’s something you need to remember. The leg is two parts, a 22 mm outside piece, and a 19 mm inner piece. The clips that hold this leg on are for 19 mm only, so make sure you clip it onto the smaller tube. Otherwise, if you put the wider 22 mm piece in the clips, it will stretch them, and it’ll be no good.
STEP 2 now, here is another important point. See how the legs work. The front (top) legs, can be extended, and left long to pack up, see how they run past on the outside. The inside legs (bottom), have to be shortened so they can fit inside like shown by the arrow. There should be a red mark on the legs, to show you how far you need to drop them back to. It’s a good idea when you get it, to sit it on it’s back like this, and have a look so you understand how the legs work, and how they lock into place when closed and open.
STEP 3 so, drop the rear legs down to the red line as shown. If the red line isn’t there, or wears off, you can easily get a texta a draw it on.
STEP 4 now, what you want to do, is release the spring clip. To do this, press the button in, while giving the leg a push with your foot, just a few inches, like shown.
See that, the leg has been released, but it won’t fall over, as the other leg is still locked in.
STEP 5 now lift it back in the vehicle, again using the rear black chest handle, and the front rope handle. See here, are you push it away, the legs will collapse up underneath. You need to then lock them in place, so give them a little push, and you’ll feel them lock into the tube holder.
STEP 6 now you can lock the other legs away, by pressing in the spring clip, and pushing the leg up with your knee.
All done, how easy is that. Another great aussie invention, that you can’t buy anywhere else in the world. Don’t let your mates borrow it, tell them to get their bloody own :)
HERE’S A FEW TIPS..
Once your kitchen is set up, you can pull the legs out a bit, this will take out any slack in the legs, and make it a bit more rigid. Also, when your DCB is loaded in the truck, you can put anything you like on top, it’s very strong, so don’t be worried to put eskies etc on top….
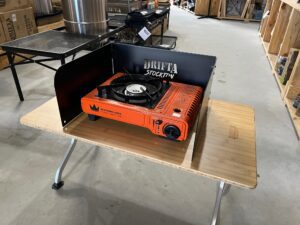
See the cover for the single burner stove, this makes an ideal windbreak. It can be tucked under the corners of the stove so it won’t blow over.